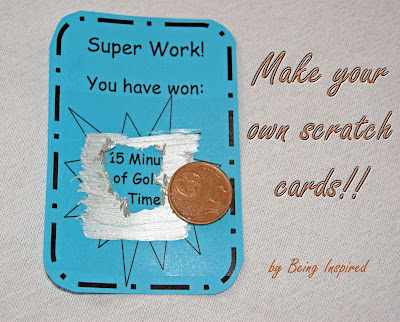
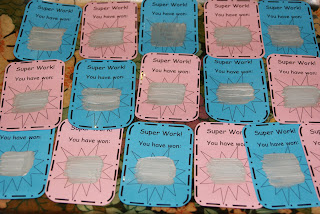
So all this free time is giving me a chance to search for loads of great ideas for the classroom. I found this one a while ago over at ArtMind but just got around to giving it a try!
How to Make your Own Scratch Cards!
There are so many uses for this (and even if there wasn't it'd still be super fun!). You could make cards and cover the greeting with scratch paint, you could use it to make "save the date" cards, you could use it to run a fundraiser or just to leave sweet notes for the ones you love.
But me? I'm going to use it to make classroom reward cards! If the kids are being particularly well behaved or trying exceptionally hard they are rewarded with one of these cards. They pick one at random and scratch it off to see what their reward is! Who wouldn't love that? :)
Want to know how to make some of your own?
- washing up liquid
- coloured/white card
- clear contact
Mix 1 part washing up liquid with 2 parts acrylic paint .
.
It works best if you leave it to settle for 10 minutes or so, otherwise your paint might be a little bubbly! Oh and the best part is - as it's one third washing up liquid it's super easy to clean up after! :)
Print and cut out your reward cards (see the end of this post for a link to download mine for free!). My printer is out of colour ink so I just printed mine straight onto coloured card but I think it'd look so much cuter if you printed them in colour on white paper and then backed them onto coloured card. Next time!
Cover the star on each card with a piece of sticky back clear contact.
Place this over whatever you plan to cover with paint, it'll make it much easier to scratch off.
Then paint over the writing!
It might not fully cover it first time so just add a second coat once its dry.
Then grab a coin and see what you've won!
Things I've learnt:
- Two thin coats of paint works better than one thick one. It seems to scratch off better.
- It takes a while for the paint to dry. And some of the writing that looked hidden when wet could be seen when dry so make sure you leave enough time for touch ups!
- You could probably laminate them instead of covering with clear contact and ask the kids to return them so you could re-use them. But the contact is cheaper. And the kids will probably want to keep them! :)
- I had some left over paint so I painted some squares of clear contact. Now next time I'm making them I can just print, cut and stick on the scratchy stuff!
And if you like them and want to show your appreciation by clicking on a few ads I promise to keep supplying you with free stuff for your classroom! :)
Don't have time to make them now? Feel free to pin for later! :)


My kids love scratchers!
ReplyDeleteBrandi
Success in Second Grade
Don’t forget to check out My Birthday Month Giveaway
This is such a great idea. Thanks for sharing and the freebie.
ReplyDeleteArlene
LMN Tree
So cool! Thanks. :)
ReplyDeletehttp://thebalancedclassroom.blogspot.com/
So cute! I love this idea and so would my kiddos!!
ReplyDeleteI'm a new follower too!
I'd love for you to buzz by sometime=)
Heather
The Busy Busy Hive
Thanks! I love new followers! :) Heading over to check out your blog now too!
DeleteSo cool idea..I would definitely remember this with plastic card printing when i have to try it.
ReplyDeleteThis is great! I can't wait to make these for the kids. Thanks so much for linking up to Creative Thursday. Can’t wait to see what you share this week! Have a wonderful week.
ReplyDeleteMichelle