Showing posts with label chocolate. Show all posts

Sunday, 23 December 2012

Strawberry Christmas Tree

Strawberry Christmas Tree
I have a few quick little Christmassy things that I want to get up on the blog before Christmas, in case anyone is in need of a last little bit of inspiration! :) I had seen these cute strawberry Christmas tress all over pinterest (like this one from Can't Stop Making Things) so I just had to have a go myself!

It sounded pretty simple - grab a styrofoam cone, pour melted chocolate on it and stick the strawberries to it. Unfortunately, life is never simple! :) Firstly, I couldn't find a styrofoam cone anywhere! I eventually found a site I could order them from online but they wouldn't have arrived on time. So I went to a flower shop and bought a piece of oasis! I made a cone shape out of a piece of card and cut the oasis to fit underneath it. Then I covered that in baking parchment and poured the chocolate on!

I was feeling pretty proud of my problem solving skills. But I wasn't finished yet. I started sticking on the strawberries but they wouldn't stick! They just kept sliding down the cone! I'm sure if I had had more time I could have done the bottom row and waited for the chocolate to harden a little and then do the next layer. But I was in a rush, guests were starting to arrive!

Strawberry Christmas Tree

So I roped in some helpers (my sister and cousin) and we decided to try pushing cocktail sticks into the cone first and then sticking the strawberries onto them! If the cone had been made of styrofoam this would have been genius! But getting cocktail sticks through baking parchment, card and oasis is tough!! We persevered though and it was all looking great until ... we ran out of strawberries!! 

So we ended up with a half empty tree of chocolate covered strawberries. :( But it was still a huge hit! Everyone loved it! 

Things I've Learnt:
- Buy extra strawberries!!
- Use a styrofoam cone if possible.
- Keep some cocktail sticks handy in case your strawberries start to slide. 


Friday, 5 October 2012

Halloween Cookies


Chocolate Halloween Cookies

So blog-land is filled with all things Halloween at the moment. And being an Irish girl I figure it's my duty to join in on the fun. Hallowe'en is originally Irish after all.

Surprised to hear that? Well I don't blame you. Most people automatically associate Halloween with America. And to be honest I don't think we do near enough in Ireland to embrace Halloween.  But it's still kinda a big deal here. Supposedly it derives from the Celtic festival of Samhain. This was a celebration of the beginning of winter and the darker half of the year. And it does get dark. :( We're talking 4pm dark. But you can't expect those poor souls to go a roaming if it's bright outside! 

I grew up dressing in black sacks with coal smeared on my face (a witch) or with an old sheet thrown over me (a ghost) and heading out trick or treating. My neighbours were pretty keen on the  trick part which they led me to believe meant that I had to do a trick to impress them (say a poem or tell a joke) before I was given any peanuts or apples or sometimes Wagon Wheels if we were lucky! Then we'd come home and play some Halloween games, like bobbing for apples.

Oh and the best bit? Dinner! We'd always have Colcannon. There may be a blog post in this on its own actually. Let me know if you'd like the recipe! It's basically mashed potato mixed with cabbage or kale but like all my favourite foods there's a surprise inside. You wrap coins up in baking paper and hide them in it! We used to get so excited searching for money and competing to see who had the most. 

Oh and then after dinner we'd have Barm Brack. It's a kind of bread with sultanas and raisins in it but hidden somewhere inside there's a ring! Now ours tended to be a cheap plastic ring but it was still pretty exciting. I didn't even like the bread as a kid but I'd eat it just to try to win the ring. :) Traditionally I think the barm brack was used for fortune telling. They used to put a coin and a piece of cloth and a few other things in with the ring and each had a meaning. If your piece had the coin in it then that signified good luck or wealth in the coming year. 

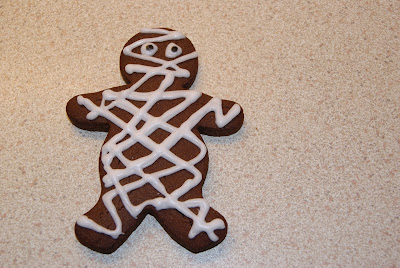
Anyway, you're not here for my reminiscing! You want to make cute little skeleton and mummy chocolate cookies, right? :) I was going to make these as gingerbread men but something about that just seemed too Christmassy. Plus I was making them for my sister and I wasn't sure if she liked ginger. But I knew she liked chocolate! :) I found the recipe and idea over at Our Best Bites. Check it out for some even cuter little skeletons!

Ingredients

-  1 cup (2 sticks) butter
- 1 cup sugar
- 1 egg
- 1 tsp vanilla essence
- 2 ½ cups plain (all purpose) flour
- ½ cup cocoa powder
- 1 tsp cinnamon


Preheat oven to 350° F (175° C). Line baking sheets with parchment.

Cream together butter and sugar until light and fluffy. Beat in the egg and vanilla essence until well combined.


Mix flour, cocoa powder and cinnamon together. Slowly add to the butter/sugar mixture, stirring first and then beating until well combined.

Wrap the dough in cling film and place in the fridge for 30 minutes (or the freezer for 5/10). Lightly dust your work surface with a mixture of cocoa powder and flour. Roll out the dough to about ¼ - ½ inch thickness.

Use your favourite gingerbread man cutter to cut out your little men and place them on your baking sheet.

Bake in the oven for 8-10 minutes. Leave to cool for a few minutes and then transfer to a wire rack.


Chocolate Skeleton Cookies

Chocolate Skeleton Cookies

Then get decorating! I just used icing sugar mixed with a bit of water for the icing. Then use a piping bag to draw on his bones. For his face draw the outline, eyes and mouth and then fill in the rest.

Chocolate Mummy Cookies

Chocolate Mummy Cookies

I wish I'd used a thicker nozzle for the mummies. But they're pretty forgiving. Just drizzle it over any old way. And don't forget to give him some eyes!


 Things I've Learnt:
-  It's kinda tricky to tell if they're done cos they don't change colour but the dough will look less wet. 8 minutes was plenty for my little guys.
- If you get a bit excited transferring them to the wire rack you may accidentally break their heads off... But that's just scarier right?
- Doing the icing takes forever!! Give yourself plenty of time. :) The skeleton icing was actually much easier than the mummies! But that's just cos I'm an idiot and couldn't figure out what it should look like.
- I kinda wish I'd made ghosts too. They'd be so easy - just cover his body in white icing and give him little black eyes.
- Oh and I just bought a black icing pen. Too much fun! I just need to think of more uses for it than mummy eyes...
- Check out my grape Halloween costume for more Halloween-y fun! :)

Chocolate Halloween Cookies


If you want an easier option I love these cute cookie cutters!! They do all the hard work for you! :)


Thursday, 27 September 2012

Day 27 - White Chocolate Truffle Cupcakes

There's been a bit of a lack of baking round here lately so last night I decided to fix that by making the most delicious decadent cupcakes! White Chocolate Truffle cupcakes - sound amazing right? :) I've adapted this from a recipe I found at The Pampered Chef.

White Chocolate Truffle Cupcakes


And even better - the truffles are hidden inside the cupcakes! And you all know how much I love hiding stuff in cupcakes! (Like these Brownies Cupcakes with strawberries hidden inside and Inside-Out Carrot Cake Muffins).

Ingredients:
Cupcakes
-  1 ¾ cups of plain flour
- 2 tsp baking powder
- ⅔ cup of whole milk
- ½ tsp vanilla essence
- 4 egg whites
- 85g butter
- ½ cup granulated sugar
- ¼ cup sour cream
- 12 white chocolate truffles

Icing
- 175g white chocolate
- 200g cream cheese
- 55g butter
- 1/2 tsp vanilla essence
- 2 cups icing (powdered) sugar


Preheat your oven to 160°C (325°F). Place muffin cases into your muffin tin. (I still think these are cupcakes and not muffins though!)


Add flour and baking powder to a bowl and stir together.


Combine milk and vanilla essence in a glass/small jug.


Separate your egg whites from the yolks.


Add egg whites to a bowl and beat until stiff peaks form.


Beat butter and sugar together in a large mixing bowl until fluffy.


Add sour cream and beat until smooth.


Add flour mixture in three parts, alternating with milk mixture in two parts. (As in flour, milk, flour, milk, flour!) Beat until well combined.


Fold in egg whites and stir until smooth.


Divide the mixture evenly between the muffin cases.


Bake for 17 - 20 minutes until lightly golden brown.


Unwrap your white chocolate truffles. Try not to eat them all. :)


Now the fun part! As soon as you take them out of the oven snip an X in the top of each cupcake. Press one truffle into each one! Leave them in the muffin tin while you do this. The truffle's will melt into the cupcake. mmm :)


Then place them on a wire rack to cool.


Now for the icing - melt the white chocolate. Put a bowl over a saucepan of hot water on a medium heat. Place the white chocolate in the bowl and slowly melt, stirring all the time. (Nothing worse than burnt chocolate so take your time and don't microwave it!!)

Let the chocolate cool (pour ice cold water into the saucepan and place the bowl into it to speed this up). Then add cream cheese, butter and vanilla essence. Beat until well combined.


Slowly add the icing sugar and stir. Then beat until smooth. Then ice up your cupcakes! :)


White Chocolate Truffle Cupcakes


Things I've learnt:
- This recipes uses a lot of bowls! Keep your main big mixing bowl for the butter as that's what you'll be adding everything else into. I used mine for the flour and had to transfer it to yet another bowl! (I love baking but hate washing up after so anything to avoid using unnecessary bowls!!)
- The recipe says to put the truffles in as soon as you take the cupcakes out of the oven but I think I'd leave them a few minutes first in future. That way the truffle would melt but not completely like mine did.
- There's a reason why the truffles are to be put in while the cupcakes are still in the tin though. I took one out to see if I could get it in better (as in without just shoving it in!) and the sides of it cracked! :(
- This makes a lot of icing. I'm not a huge fan of excessive icing on cupcakes so I'd say half the amount would have done me. As it is I went overboard icing them and still have a little bag of icing in the freezer for another day. Can you even freeze icing? Well we'll see! :)
- I think I'd try milk or dark chocolate truffles next time too. Just to add some colour!
- I love this website - Traditional Oven - for converting measures of ingredients.


Thursday, 13 September 2012

Day 20 - Chocolate Stuffed Raspberries

We have loads of raspberries growing on the bushes in the garden at the moment. So many that I'm almost getting sick of raspberries. Almost, but not quite. :) Especially after I found a great idea for a raspberry snack on pinterest - Chocolate Stuffed Raspberries! yum!


Dark and white chocolate chips stuffed inside juicy raspberries. Delicious! :)


Things I've learnt:
- Chocolate and raspberries are an awesome combination!
- Oh and I've made it to day 20! Two thirds of the way through my challenge. Wohoo. :)


Thursday, 6 September 2012

Day 13 - Heart Shaped Brownies

In case you haven't noticed I love brownies. So this post is very self-indulgent. This way I get to eat and make brownies and record my favourtite brownie recipe from my mum's recipe book to my blog, to take with me wherever I go! :)


Honestly, make these today. Chewy, sticky, chocolatey, walnutty goodness!

Ingredients:

  • 4 oz butter
  • 4 oz plain chocolate
  • 8 oz caster sugar
  • 2 beaten eggs
  • 4 oz plain flour
  • 1/2 tsp baking powder
  • 4 oz chopped walnuts
  • pinch of salt


Preheat the oven to 170 degrees.

Weigh the chocolate and butter.


 Melt in a bowl over hot water on a low heat. Keep stirring until the chocolate and butter are fully melted but be careful not to let it burn!


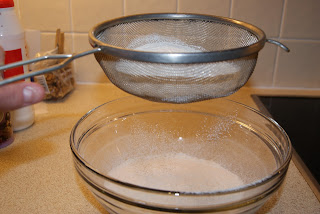
Sieve the weighed caster sugar, flour and baking powder into a bowl.


Break the eggs into a bowl and beat.


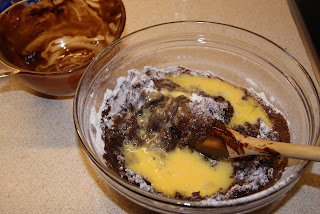
Add the melted chocolate/butter mixture and beaten eggs to the dry ingredients. Stir until combined.


Weigh the walnuts and chop into small pieces.


Add the walnuts to the mixture and stir in.


Line a swiss roll tin with parchment and spoon the mixture in. Spread to the edges.


Bake at 180 degrees for 25 - 30 minutes.


Leave in the tin for 10 minutes to cool.


Cut into squares and dust with icing sugar.


Or cut into hearts with a cookie cutter. And enjoy eating all the scraps! :)


Things I've Learnt:
- I ♥ brownies.
- You can get heart symbols by typing "♥" when you're editing in html mode. :)

LinkWithin

Related Posts Plugin for WordPress, Blogger...