Showing posts with label craft. Show all posts

Thursday, 15 November 2012

Homemade Glitter Name Crayons

Homemade Glitter Name Crayons


So it's all go on the Christmas present production front here. Next up - homemade glitter name crayons! :) I first saw and pinned this idea almost a year ago - re-use old crayons to make cute little heart shaped crayons! I'll probably still do this for my class for Valentine's Day but hearts aren't very Christmas-y and it's been too long since I last melted something so decided to make these cute glitter name crayons instead!

They're so easy to make, especially if you can rope in some little helpers to peel the paper off the crayons! Here's how you do it:

Broken crayons all set for melting!

First peel the paper off your crayons, break them into little pieces and sort them by into colour groups. It's up to you how many different colours you want in each crayon but be careful not to let them mix together too much when they're melted unless you want a whole bunch of brown crayons! 


A craft knife will make the annoying job of peeling so much easier! :) Failing that, pop them in a  basin of warm water for 10 minutes.


Next grab some alphabet ice cube trays. I searched for weeks for these but ended up buying them on amazon. These are the ones I bought. They're freezer and oven safe so perfect for this!
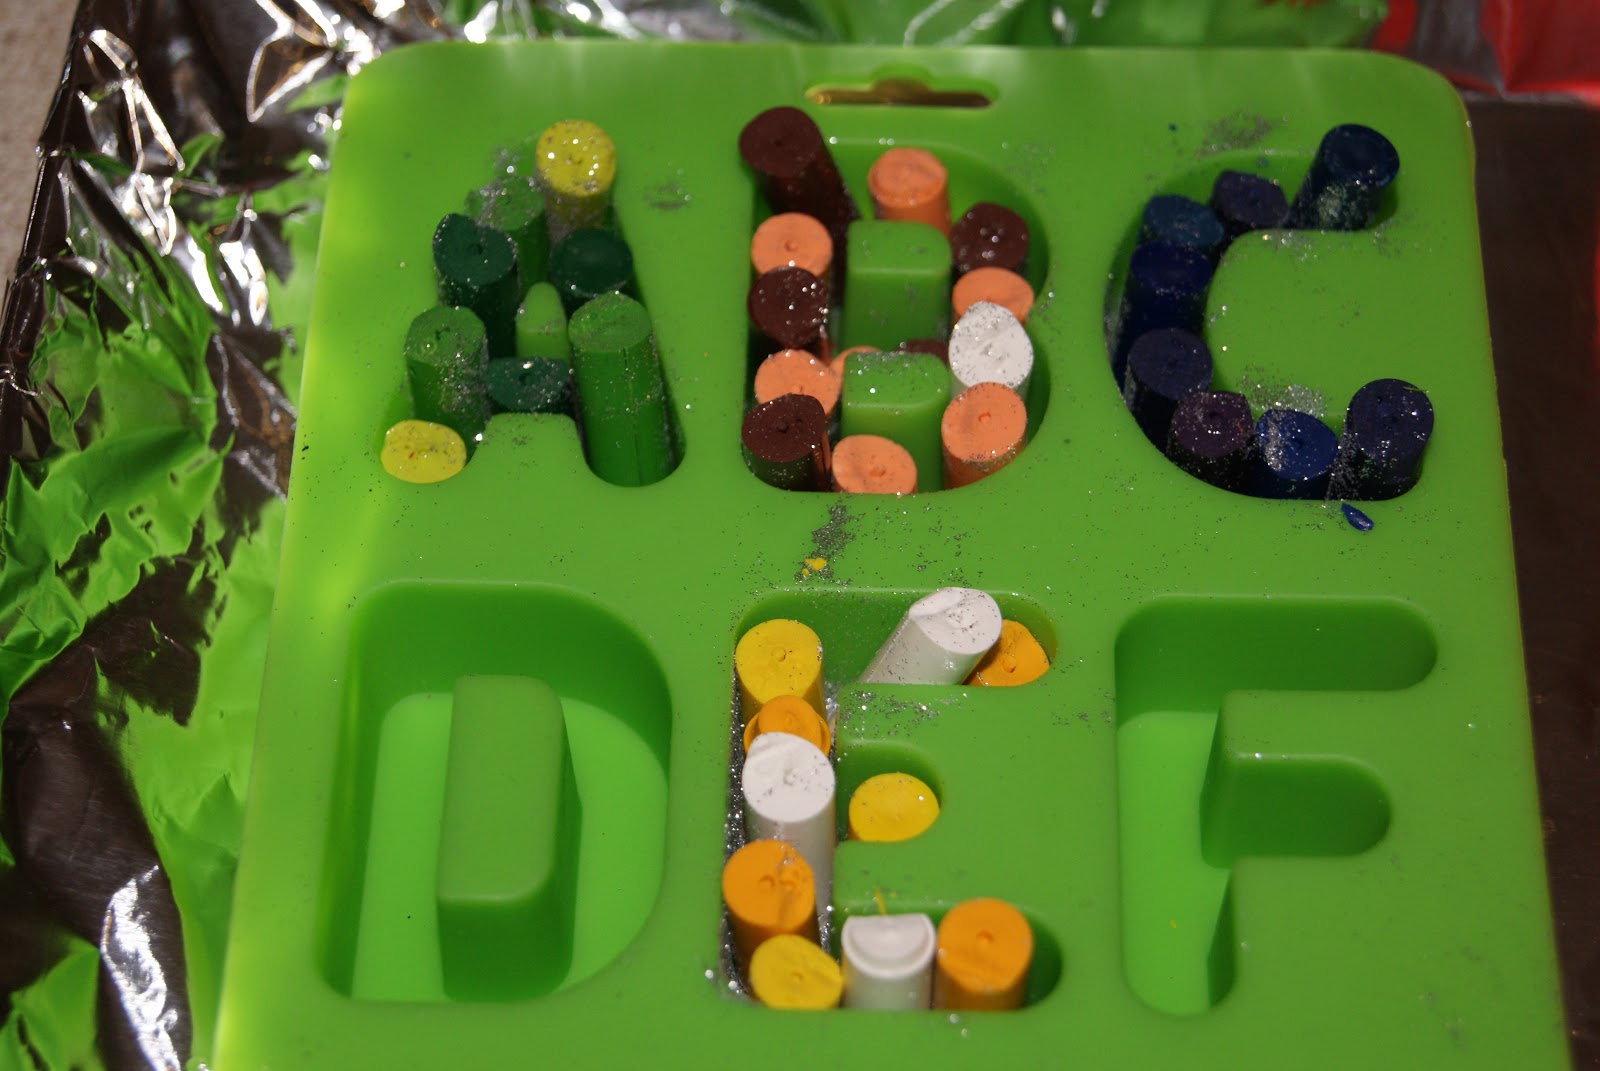
Melted crayon letters

Pour a little glitter into the bottom of the ice cube tray and roll your little crayon bits in more glitter. Then slot them into the letter spaces. 


Put them on a tray and pop them into the oven. It's a good idea to cover your tray in tinfoil in case you get any spillages, I can't imagine cleaning crayon out of the oven is much fun! 

I had them in on a low heat (about 140° C) for about 5 - 10 minutes. But just keep an eye on them and keep checking them. Make sure they're fully melted and then take them out of the oven to cool. Be careful moving the tray, the more you shake them the more the colours will mix.


While I was waiting for them to cool I sewed some little bags to keep the crayons in. :)


Then pop them out of their trays and into their little bags! 


They actually come out quite easily, I didn't have one broken crayon. Although I suppose if they do break you know exactly how to fix that! :)

Homemade glitter alphabet crayons

The letters can of course also be used to make lots of other words and are great for some tactile letter exploration. Next I'm going to make a full alphabet set for school. If I can bring myself to peel more crayons that is... :)


Things I've Learnt:
- As ever when crayons are concerned it's worth paying the little extra for good quality ones! At a push I'd mix in a few old cheap ones with the Crayola ones.
- Peeling the paper off is definitely the most time consuming part of making these. So either soak them in warm water first or use a craft knife to slice the paper wrapper open.
- I wish I'd added a bit more glitter but I only had glitter in a bag and it was so messy!! Next time I'll get a little tube and sprinkle some more in. Cos really you can never have too much glitter in life. :)
- Use a toothpick to swirl the melted crayons if you want the colours to marble a little or mix completely. I didn't touch most of mine (bar the light blue one) as I wanted the colours to stay a little distinct.


Saturday, 3 November 2012

Chalkboard Wine Glasses

I have some of those cute little wine glass tags that party guests hook onto their glass to remember it's theirs. They're reindeer and they are adorable! But people often forget which reindeer is theirs! And reindeer should really only be used at Christmas time. So I decided to search for an alternative. Turns out many many people had already solved my problem! Paint the glass with chalkboard paint and let guests write their names on them! Too cute!

An alternative to glass charms - chalkboard paint!


I've had this pinned for ages but only just got around to buying some cheap wine glasses to give it a try this weekend. I was originally thinking they'd be cute to use at Christmas (watch out reindeer!) but it turns out my red chalkboard paint is actually pink! Ah well, I love them anyway!

What you need to make your chalkboard wine glasses

Pretty happy with the results. And they were really easy to make! My inspiration came from Just Short of Crazy . She had the bright idea to dip the entire bottom of the glass into the paint. But my paint pot was pretty small and I figured I end up wasting a lot of paint if I transferred it to a bigger container. So I just painted them with paintbrushes. I was afraid they would end up with brush stokes on them but they dried perfectly! :)


I did a bit of research for this one and the main problem people seemed to have was with the paint dripping as it dried. So I wrapped the glass in paper towels and secured them with some masking tape. It was pretty much all for nothing though - no drippage! Maybe it was my blackboard paint but a little bit of masking tape would have done the trick. Better safe than sorry though, right?


Oh and if you don't have any blackboard paint there's a great tutorial over at Salt Tree to make your own! I haven't tried it yet but it looks great. I might try making some green and red paint so I can make my Christmas glasses after all.


Or I could just write some Christmassy messages on these ones... :)

Make your Own Chalkboard Wine Glasses
I also painted an old picture frame with the paint too. All that's missing is a photograph... and some wine!

Things I've learnt:
- Don't use cheap pound shop paintbrushes or you'll end up with lose brush hairs ruining your pretty glasses!
- Make these a few days in advance of when you need them. I had to do two coats and it takes a long time to dry fully. But the actual process is very quick!
- They're probably not dishwasher safe but you can hand wash them no problem. Just don't try to wipe them clean with a damp tissue. Unless you like little bits of white tissue all over your pretty glass! Oops.


Linked up to - Thirty Handmade DaysLadybird LnIt's a Hodgepodge LifeMy Romantic HomePetals to PicotsBlissful and DomesticCraftionaryOne Artsy MamaPractically FunctionalWTFabIt's So Very CheriSewlicious DecorA Night Owl BlogSix Sisters' StuffCreating my Way to SuccessBe ColorfulMaking the World CuterThe Chicken ChickProject InspireSew Can DoSewing BarefootToday's CreativeSugar Bee CraftsFunky Polka Dot GiraffeHope StudiosNew NostalgiaHomeworkLadybug BlessingsSo I Married a Craft BloggerThe DIY DreamerSeven Thirty ThreeFireflies and Jellybeans

Monday, 8 October 2012

Origami Carambola Flowers

Origami Carambola Flowers


Making origami flowers on a Sunday afternoon, sure what else would you be doing? :) Thanks so much for stopping by to check out my origami creation! Be sure to have a look at some of my other crafty projects while you're here.


These are called Carambola as they look like a cross section of starfruit (which is also know as a carambola). I think they look like flowers so I call them Carambola Flowers which possibly makes no sense but it works for me!

 I'm not even going to try to explain how to do it because this youtube video does it so much better than I could! :) My first attempt was a little lopsided but the second one turned out pretty good so even if you're a bit of an origami novice like me I'd say give them a go!


Things I've Learnt:
- Use origami paper. The first one I made I used light card and it was the same colour on both sides so I ended up making some of the creases on the wrong side! Origami paper also just creases better! Amazon have nice cheap origami paper (e.g. Origami Paper - Assorted Colors)
- I'd say heavier paper would be best but I didn't have any so I just used normal stuff and it worked just fine.
- This one is all about precision so take your time in making those creases!
- As with most things in life - practise makes perfect!


Sunday, 23 September 2012

Day 25 - Shopping List Fridge Magnets

I don't know about you but I love fridge magnets!! And luckily you can pick up magnetic paper in the €2 shop so you can print your own pretty easily. Here's two of my favourites.

Shopping List Fridge Magnets

Shopping List Fridge Magnets! These are really easy to make. I've uploaded the template so just print onto magnetic paper, cut and stick on your fridge! 

Then next time you go to get some tomatoes from your fridge and realise you've none left you can take your tomato magnet and place it under the shopping list magnet. Keep building your list as you run out of things/think of what you need. Then before you head out shopping you can just glance at your fridge and see what you need! Better yet take a quick picture of your list on your phone and then you can bring it with you without even writing it down. 

Plus they look kinda cute. :)


I've left it as an editable word document so you can change things like "rashers" to "bacon" in case you're not Irish! :) Unfortunately I don't have any pictures of these as I forgot to take one before I gave them to my sister but I think I'll have to make some for myself anyway!

(And if you like them and want to show your appreciation by clicking on a few ads I promise to keep supplying you with free stuff! :)

Things I've learnt:
- Print this out on a piece of normal paper first to make sure it prints okay. I tried to use up as much space as possible and it prints fine on my printer but I don't want anyone ending up with the edges missing and wasting magnetic paper!

Wednesday, 12 September 2012

Day 19 - Balloon Parcels!

Balloon Parcels!
Remember the Princess Finger Puppets that I made a week or so ago? Well they've been featured on "Sew Cute Tuesday" @ The Creative Itch. Which means I get my first featured on button!! :) So once I finally pick my new blog design I've another page to add to display my button!

Photobucket
Now with added Rapunzel!


This also reminded me that I hadn't actually got around to sending these puppets to their new home! I remember being a kid and always being so jealous of all the post that my parents got (if only I had known that most of those were bills!). So rather than give my cousin's their presents in person I thought it'd be fun to post them. 


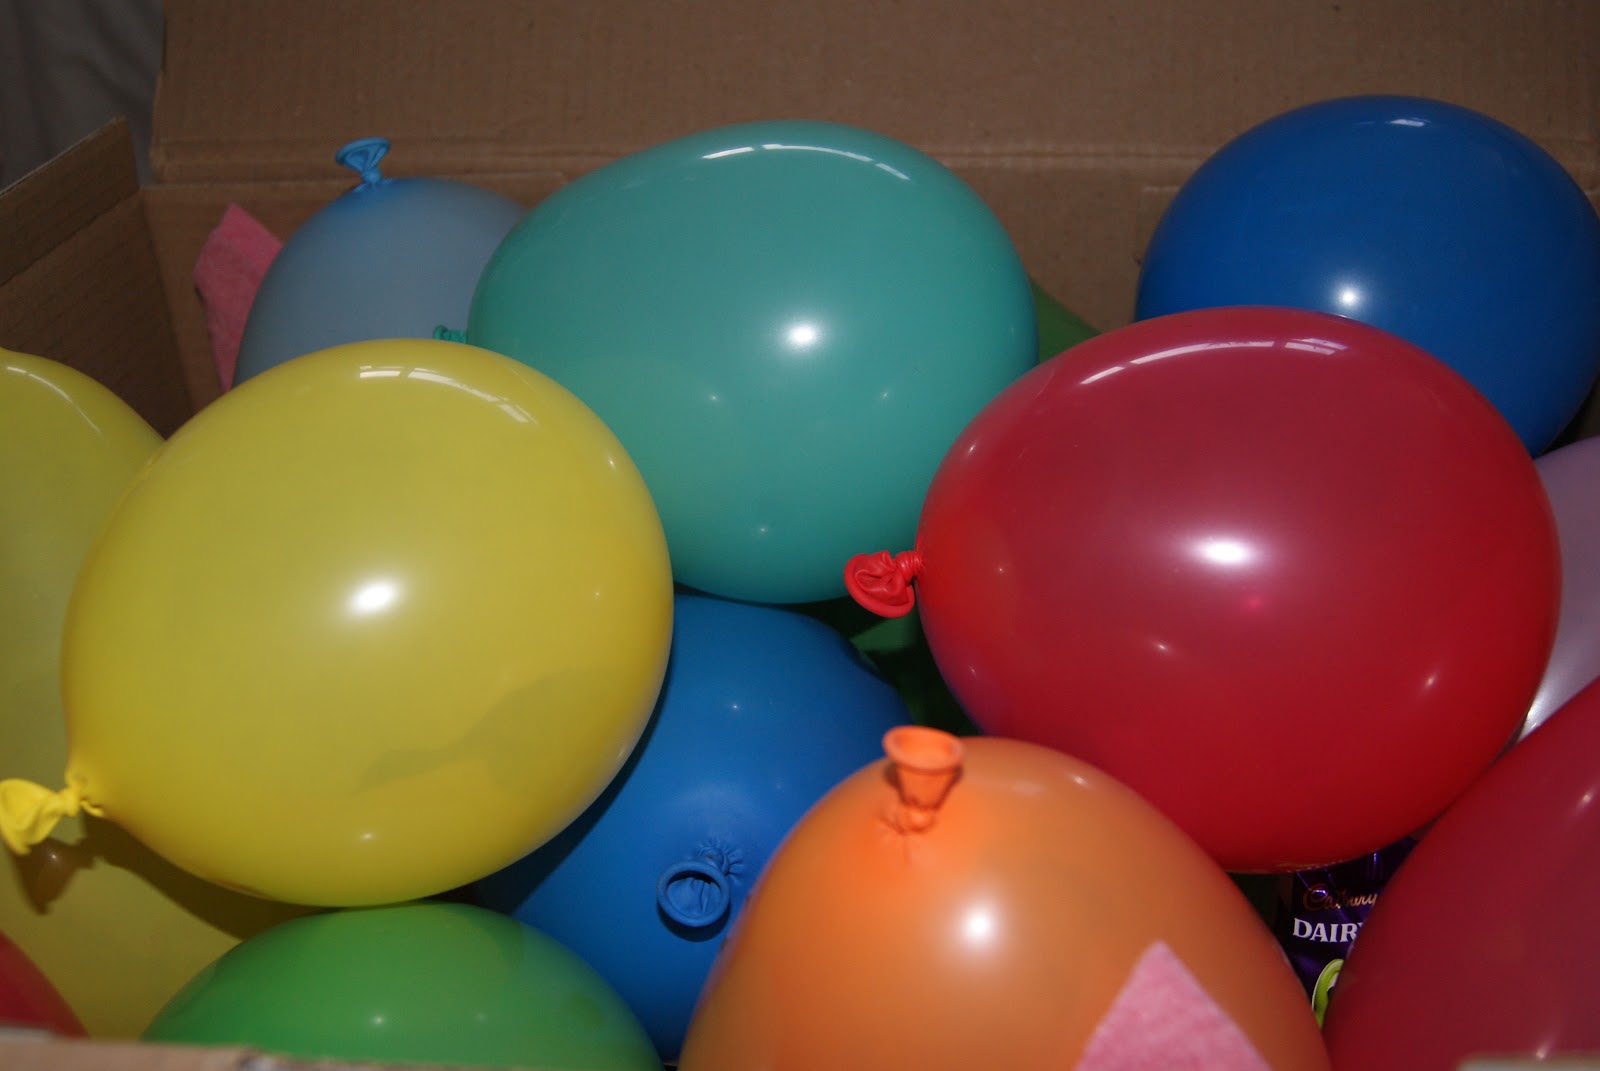
I had seen a great idea on pinterest (from She's Crafty) for sending kids money on their birthdays. You put the money inside balloons, inflate them and send the child a box of money filled balloons! So I decided to put my little puppets and some sweets into balloons for the girls!


 It was a bit tricky getting them into the balloons at first but in the end I just stretched them as much as I could, folded up the finger puppets and squashed them inside. Once I blew up the balloons they popped out into their normal shape (and no-one lost an eye!)


The finished box! What kid wouldn't love to receive this in the post!! :)

Things I've Learnt:
- Putting lollipops inside balloons is not such a good idea... unless you like the sound of balloons bursting!


Wednesday, 5 September 2012

Day 12 - Melted Crayon Art

I think is the first thing I saw on pinterest that really made me go "oooh I wanna do that!" So even though melted crayon art has been done to death I just had to have a go myself! And it was oh so very much fun. Turns out that melting crayons is even more fun than melting plastic! :)


Things you'll need:

  • A few boxes of crayons (I used 3 x 24). Crayola melt much better than cheaper brands.
  • A canvas. (whatever size you like, I got lucky and picked mine up for €2)
  • Some tracing paper/baking parchment
  • Some black paint
  • A page with the words you want printed on it
  • Some super glue/ a glue gun
  • A hair dryer


Grab a bunch of crayons.

Spend forever peeling off the wrappers.

Realise that it'd be so much easier to just throw the crayons in a basin of water....

... and wait for the wrappers to come off themselves!

Line up all your crayons at the top of the canvas and super glue them in place. Try not to get super glue all over your fingers. :(

Print out a word onto plain paper. Place a piece of baking parchment over the word. Trace over it in pencil and then flip the parchment over and trace over the letters again (so that you're not transferring backwards letters). Place the piece of parchment down on your canvas and trace over the letters once more.

Paint in your letters with black paint. You probably should use fancy acrylic paint and expensive paint brushes and not poster paint and an old make up brush... :)

Prop your canvas against a chair with a big piece of paper (or an open paper bag) behind it. Lay out lots of newspaper on the ground underneath and around it. Plug in your hair dryer and get melting!

Experiment with the different settings. I found that a high heat but low power worked the best. Too much power and the wax went everywhere! Start at one side and work your way along to the other, aiming your hair dryer towards the bottom half of your crayons at first. Keep going til you get the look you're after!

Sit back and admire your masterpiece! Love it. :)

Want another idea for what to do with your broken crayons? Check this post out.

Things I've learnt:
- For some reason Crayola put way less glue on yellow and orange crayon wrappers so they come off much quicker than all the others when you soak them. Go figure!
- Melting stuff is fun!! I feel a bit like Phoebe from Friend's brother Frank, remember that one? :)
- If I was doing this again I'd definitely be a bit more patient and start at one side and not move on until I was happy with how much it had melted. For this one I kinda just wanted to get melting so I kept going back and forth over the whole line of crayons and well the drippy effect isn't as cool cos of this. (It's still pretty cool though!)
- Oh and when I opened one of the boxes of crayons a lot of the nibs were broken off so I just stuck them on without them thinking it wouldn't matter. It kinda does. The wax melts off the nibs and drips down so when there's no nib it kinda goes to the nearest nib to the right or left instead which doesn't give as nice clean lines of drips. It still works, I just think it'd be easier and look nicer if they all had nibs! And you could just glue them on.
- I wish I hadn't used the white crayons, they kinda ruin the rainbow I think.
- Oh and if I'm doing this again I'll cut the crayons in half before I glue them on, you really don't need whole crayons.
- Hey I had some actual advice in my things I've learnt section today! Go me. :)

LinkWithin

Related Posts Plugin for WordPress, Blogger...