So it's all go on the Christmas present production front here. Next up - homemade glitter name crayons! :) I first saw and pinned this idea almost a year ago - re-use old crayons to make cute little heart shaped crayons! I'll probably still do this for my class for Valentine's Day but hearts aren't very Christmas-y and it's been too long since I last melted something so decided to make these cute glitter name crayons instead!
They're so easy to make, especially if you can rope in some little helpers to peel the paper off the crayons! Here's how you do it:
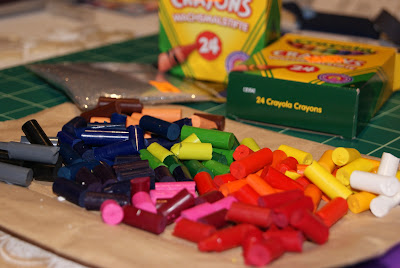
First peel the paper off your crayons, break them into little pieces and sort them by into colour groups. It's up to you how many different colours you want in each crayon but be careful not to let them mix together too much when they're melted unless you want a whole bunch of brown crayons!
A craft knife will make the annoying job of peeling so much easier! :) Failing that, pop them in a basin of warm water for 10 minutes.
Next grab some alphabet ice cube trays. I searched for weeks for these but ended up buying them on amazon. These are the ones I bought . They're freezer and oven safe so perfect for this!
Pour a little glitter into the bottom of the ice cube tray and roll your little crayon bits in more glitter. Then slot them into the letter spaces.
Put them on a tray and pop them into the oven. It's a good idea to cover your tray in tinfoil in case you get any spillages, I can't imagine cleaning crayon out of the oven is much fun!
I had them in on a low heat (about 140° C) for about 5 - 10 minutes. But just keep an eye on them and keep checking them. Make sure they're fully melted and then take them out of the oven to cool. Be careful moving the tray, the more you shake them the more the colours will mix.
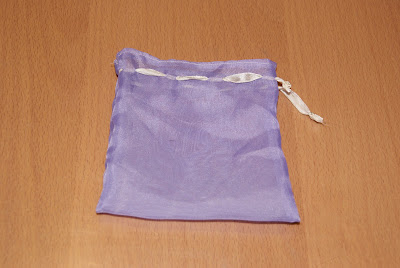
While I was waiting for them to cool I sewed some little bags to keep the crayons in. :)
Then pop them out of their trays and into their little bags!
They actually come out quite easily, I didn't have one broken crayon. Although I suppose if they do break you know exactly how to fix that! :)
The letters can of course also be used to make lots of other words and are great for some tactile letter exploration. Next I'm going to make a full alphabet set for school. If I can bring myself to peel more crayons that is... :)
Things I've Learnt:
- As ever when crayons are concerned it's worth paying the little extra for good quality ones! At a push I'd mix in a few old cheap ones with the Crayola ones
- Peeling the paper off is definitely the most time consuming part of making these. So either soak them in warm water first or use a craft knife to slice the paper wrapper open.
- I wish I'd added a bit more glitter but I only had glitter in a bag and it was so messy!! Next time I'll get a little tube and sprinkle some more in. Cos really you can never have too much glitter in life. :)
- Use a toothpick to swirl the melted crayons if you want the colours to marble a little or mix completely. I didn't touch most of mine (bar the light blue one) as I wanted the colours to stay a little distinct.
Linked up to: Hey Mommy, Chocolate Milk, Michelle's Tasty Creations, Reading Confetti, Fireflies and Jellybeans, The Crafty Blog Stalker, ABC and 123, Sun Scholars, One Artsy Mama, Thirty Handmade Days, Its a HodgePodge Life, Petals to Picots, Crafty Moms Share, Cheerios and Lattes, The Gingerbread Blog, No Time for Flashcards, Sugar Bee Crafts, Earning my Cape, Someday Crafts, Sugar and Dots, Semi Homemade Mom


Such a FANTASTIC idea! I also thought the heart shaped ones would be great as valentines, but I never thought of different shapes!
ReplyDeleteLove from your newest follower,
Katie
snaponbuttons.blogspot.com
What a great idea! I am thinking it would be a nice birthday present for my daughters friends. Thank you from Keeping my Toddler Entertained
ReplyDeleteThese are ADORABLE!
ReplyDeleteI'm nominating you for the Liebster Award. Read more about it here:
http://sewingbarefoot.blogspot.com/2012/11/liebster-blog-award.html
Shannon @ Sewing Barefoot
These are such a wonderful idea and i love all the colours too! Am featuring this activity in my Kid's Co-Op post tomorrow...thanks so much for linking up! (http://mummymusingsandmayhem.blogspot.com.au/)
ReplyDeleteThose ice cube trays are too cool! I can only imagine the endless things you can do with them.
ReplyDeleteThanks for sharing!
What a great idea!! I love your trays. Thank you for sharing at Sharing Saturday!
ReplyDeleteThanks so much. Christmas stocking just got a little more colorful over here. One name down, 6 to go!
ReplyDelete